Configuring the Build Step in DevOps
To add the build step in Azure DevOps:
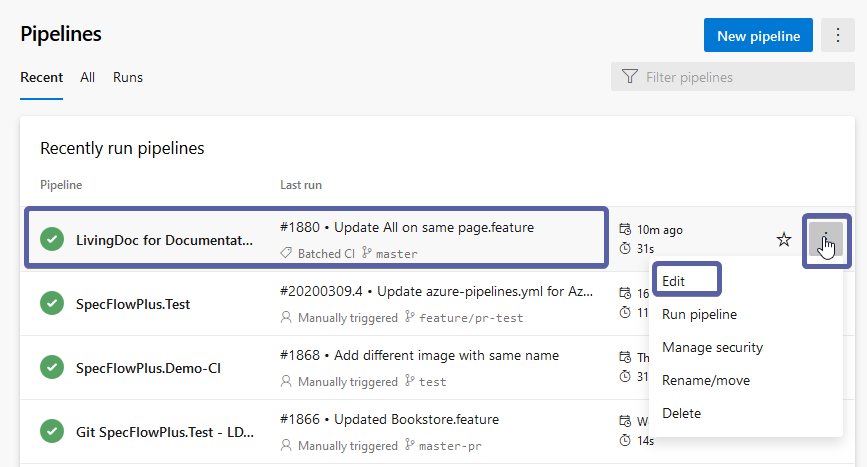
1 - Select Pipelines | Pipelines from the menu in Azure DevOps.
2 - Locate the desired pipeline from the list (or add a new one) and select Edit.
3 - The current tasks are displayed under the Tasks tab
4 - Click on the plus icon next to your agent to add a new build step.
5 - Look for “Specflow” in the search bar and add the SpecFlow+ LivingDoc build step to your build:
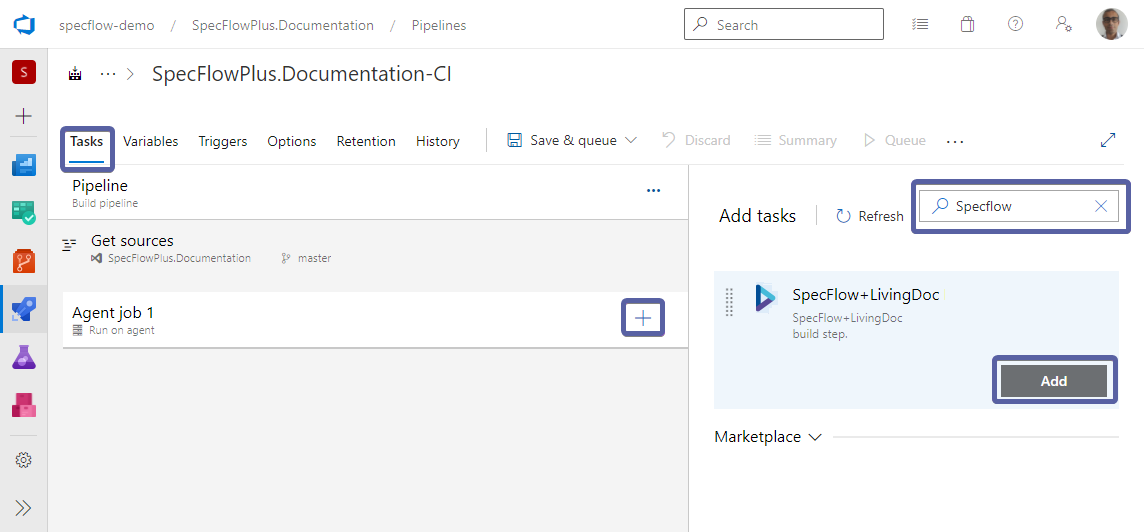
Once you add the SpecFlow + LivingDoc build step you will be prompted to setup the build configuration:
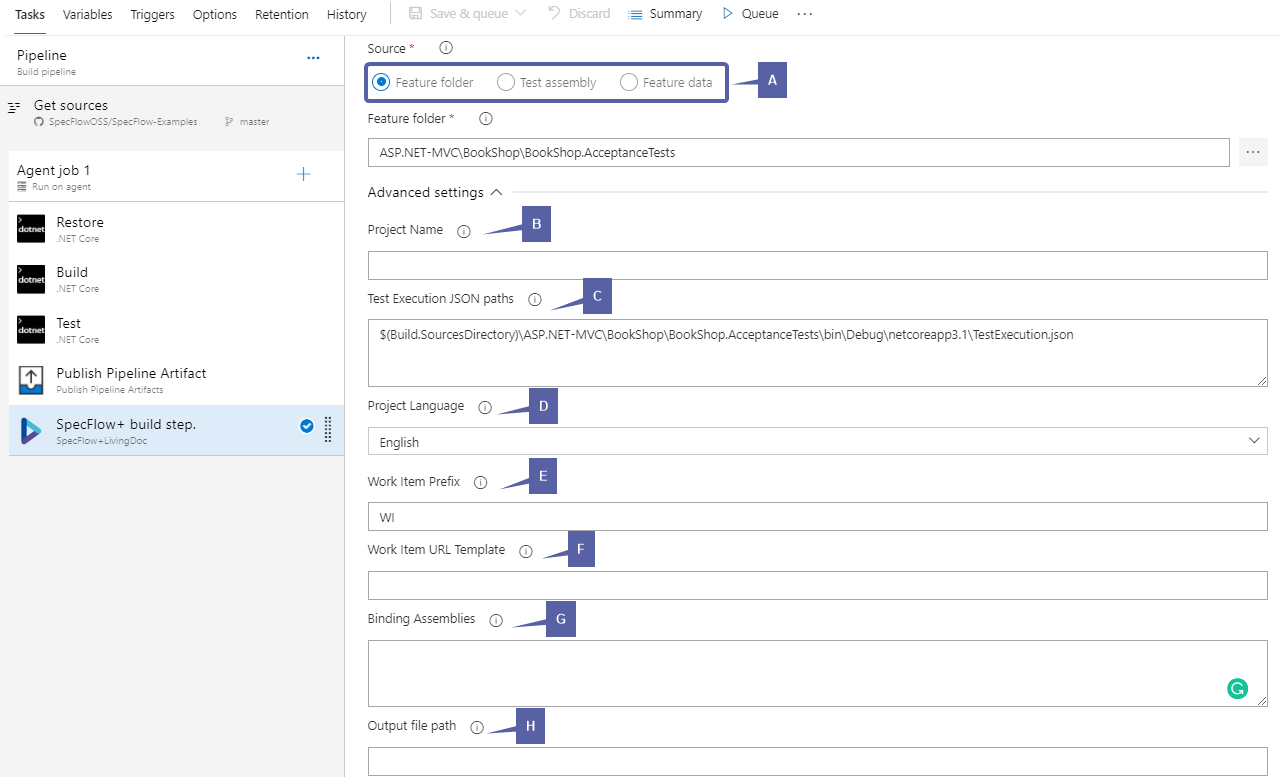
A - There are 3 sources to pick from to parse the documentation data:
Feature folder - The folder containing the feature files. Use the test project root folder if you want to include test execution results.
> Note: If you pick “Feature Folder” as your source, you will be able to edit feature files directly within AzDo.
Test Assembly - Relative or absolute path to the test assembly. Glob patterns are supported e.g.: MyProject/**/MyProject.dll
Feature Data - Relative or absolute path to the feature data JSON file. Glob patterns are supported e.g.: MyProject/**/FeatureData.json
B - Enter a Project Name. This name is used by the root node in the tree. If you do not enter a name here, the name of the Visual Studio project is used by default.
C - If you want to include test execution results in the report, you must specify the Test Execution JSON paths. It has to be an absolute or relative path to the Test Execution JSON files generated by the SpecFlow.Plus.LivingDocPlugin. Glob patterns are only supported when you use a relative path e.g.:
MyProject/**/TestExecution.json
Important: If you pick Feature folder as your source and want to display the execution results, you MUST provide the Test Project Root folder.
Note: If you have multiple JSON files, i.e. when you run tests in parallel, you may add them all here. To do so, add the path to each JSON file in a separate line (new line delimited).
D - Select the language used by your Gherkin files under Project Language. This is optional because in most cases the language can be auto- detected. You can read more about language options here.
E - If you have added links to Azure DevOps work items in your feature files using tags, enter the prefix used to identify the work items here.
For example, if you enter “DEVOPS_WI:” as the work item prefix and define the tag “@DEVOPS_WI:1234” in your feature file, the tag will link to work item #1234 when displayed in LivingDoc.
F - Enter the URL to the specified work item here. Example : https://dev.azure.com/fabrikam/FabrikamProj/_workitems/edit/{id}
G - If you are interested to see the Unused Step Definitions in the analytics tab, enter your Binding Assembly paths (newline delimited) here. If your bindings are in the same assembly as your feature files you don’t have to specify this field.
Glob patters are supported e.g.: MyProject/**/MyBindings.dll.
H - You can configure the output path of LivingDoc here.
Once you have defined all the required fields in your build step, you can queue the build.
> Note: If you want to include Gherkin files from multiple projects, add a separate build step for each of your projects.