Starting SpecMap
Once SpecMap has been installed, you can open SpecMap from the Boards menu in Azure DevOps (or Works menu in TFS):
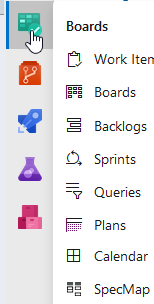
Select SpecMap from the menu.
- The first time you start SpecMap, you will be asked to sign in with your Microsoft Identity and set up your SpecFlow account.
- If you have signed in with your Specflow account, the SpecMap workspace is opened.
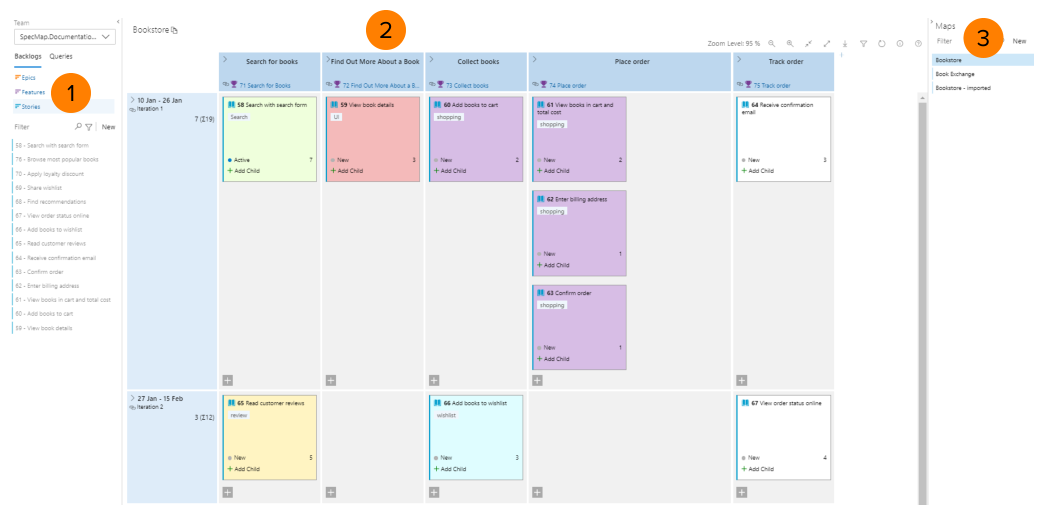
SpecMap’s UI is broken down into several areas:
- The backlog explorer on the left of the screen lists your work items. You can drag these work items onto the map as user stories.
- The map area contains your story map itself. This is where you can assign user stories to user activities, prioritise stories as well as assign slices to iterations and link columns to top-level work items.
- The map explorer on the right lists the maps available in SpecMap. You can also export maps and clone them from here.
Note: The UI’s appearance will differ slightly depending on your version of Azure DevOps or TFS.